Wait List Automation
A Wait List is an important tool for filling openings and improving customer satisfaction. The list can be managed manually or automatically depending on your needs.
Activating the Wait List
To enable the wait list feature, an Owner or Administrator should go to Settings > Calendar Settings > Admin Calendar Options and activate the switch for “Wait List Enabled” and add the email address where to be notified when those requests are added.
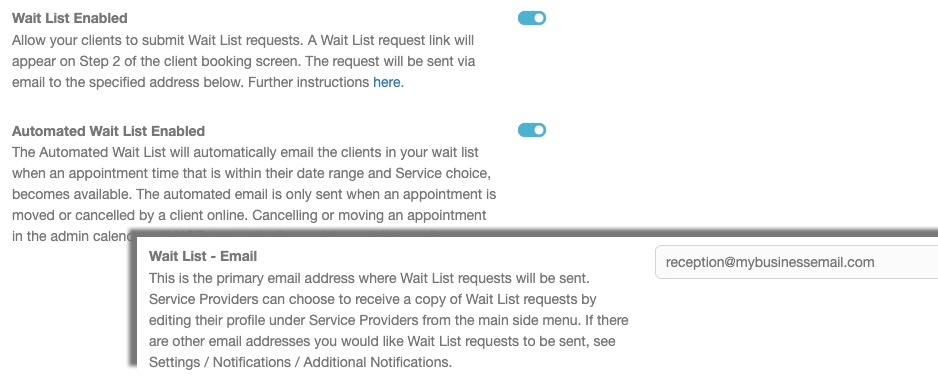
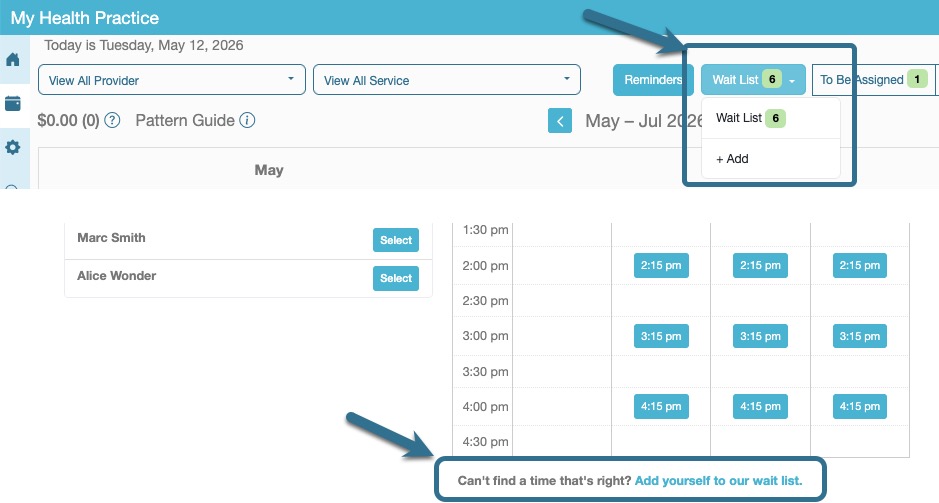
Activating the Wait List will display a Wait List button in your Admin Calendar and a link in the Client Booking just below the calendar of availability.
The Wait List Feature has 2 options:
- The Basic Wait List, which notifies you if any clients on the wait list match a cancelled or moved appointment.
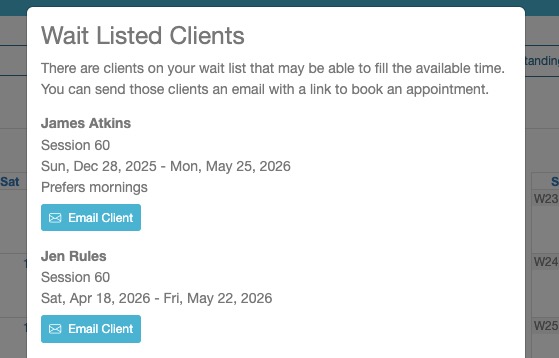
- When an appointment is cancelled or moved in the Admin Calendar, a popup message will display a list of the clients waiting for an opening for that service. You can choose if and which client(s) to send a wait list opening email.
- If a client cancels from their online profile (client view), an email is sent to your business’ Wail List Email, advising that there are clients on the list that match the cancelled service/date.
- NOTE: No wait list opening email is sent to clients automatically.
- The Automated Wait List, beyond the Admin Calendar messaging, will also send an email to any clients on the wait list that match a cancelled or moved appointment.
- This email is only triggered if a client makes the change from their online profile. Openings created from the Admin Calendar will require choosing who to email from the popup message.
- Also, an email is sent to your business’ Wail List Email, advising that there are clients on the list that match the cancelled service/date.
Adding Clients to the Wait List

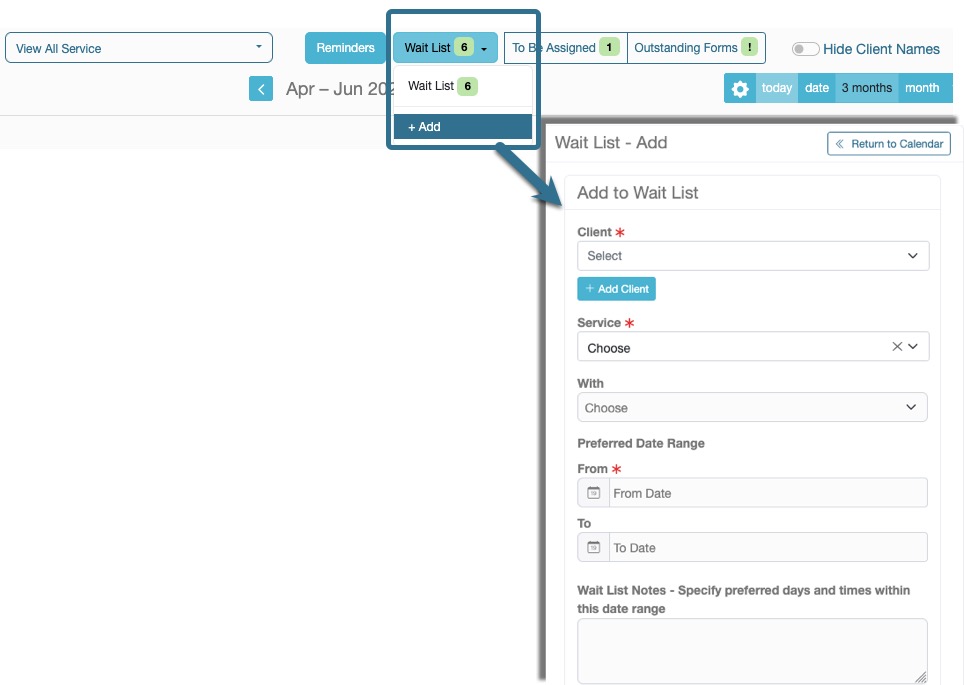
- Select the “+ Add” option to open the Wait List – Add page.
- Search for the client or add a client if not in your client database. Choose the Service and Service Provider / Stand-Alone Resource, Date Range and add notes specifying the preferred times or any other relevant information, then Submit.
Managing the Wait List
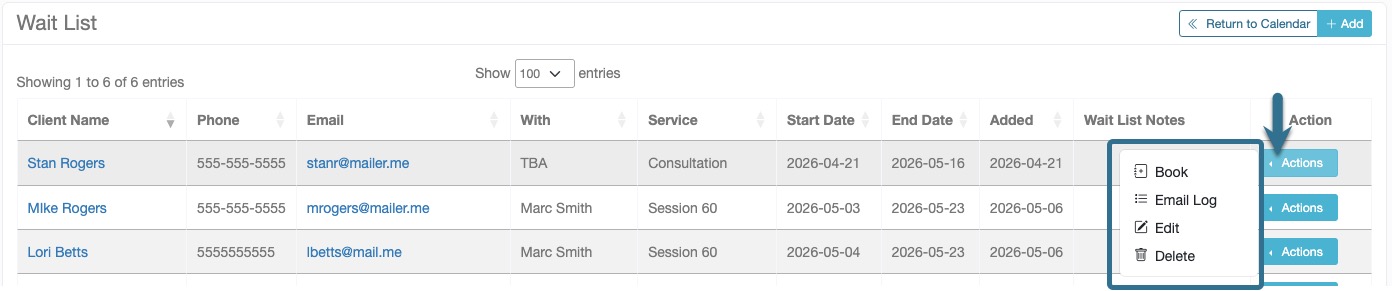
When there are clients on the Wait List, the number of clients on the list will be displayed in the Wait List button. To view the list, select the “Wait List” button and click the Wait List item with the number to the right.

From the list page you can Edit, Delete the list details or Book an appointment for the client. You can also view the “Email Log” to see when Wait List Opening notices were emailed to the client.
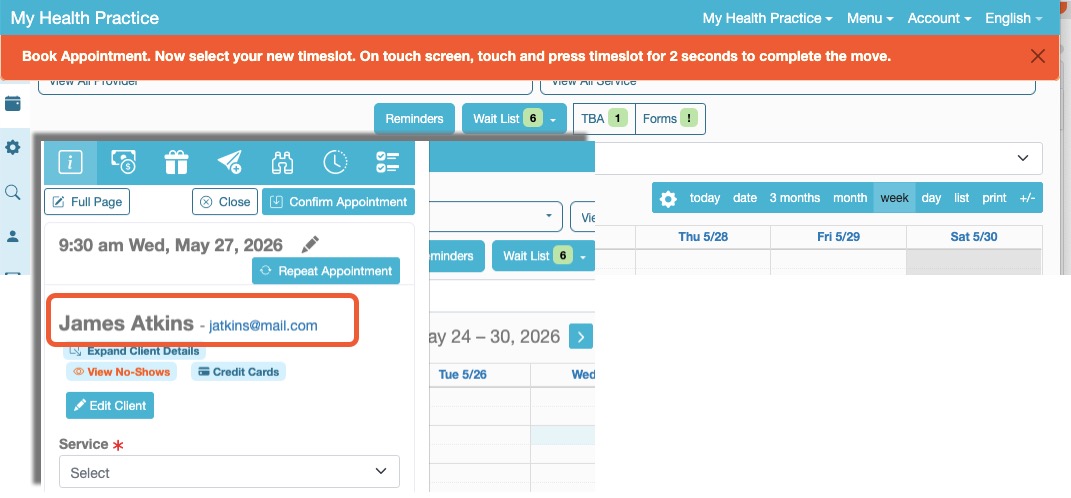
If you choose to Book an appointment, there will be a banner at the top of the page indicating the action and once you select a time, that client’s name will already be populated, you just need to set the service and provider.
Automation Features
If you choose to use the Automated Wait List, there are 2 parameters to adjust to suit your business needs. The main function of the automated Wait List feature is to send an email notice to clients on your list when a time opens up within the date range. The email is sent automatically only when clients cancel or change their bookings, not when bookings are changed from the admin calendar.
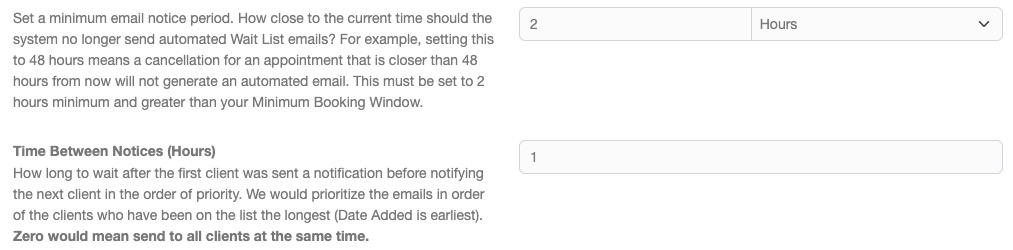
- Minimum Email Notice Period – How close to the current time should the system no longer send automated Wait List emails? For example, setting this to 48 hours means a cancellation for an appointment that is closer than 48 hours from now will not generate an automated email. This must be set to 2 hours minimum and greater than your Minimum Booking Window (Settings > Calendar Settings > Client Booking Limits).
- Time Between Notices – How long to wait after the first client was sent a notification, before notifying the next client in the order of priority. We would prioritize the emails in order of the clients who have been on the list the longest (Date Added is earliest). Zero would mean send to all clients at the same time.
Note: When a client takes action form the automated Wait List Opening email and books an appointment, the client’s entry is automatically removed from your Wait List. If there are multiple entries for the client, only the entry associated with the specific notice is removed.
Email Notification Wording
There are several email templates related to the Wait list where the wording can be edited to suit your needs from Settings > Notification > Email Templates.
- Wait List Requests – This email is sent to the business’ Wait List email address or associated Service Provider when a client adds themselves to the Wait List from the client side.
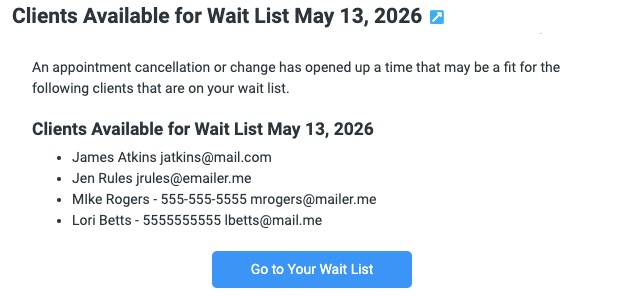
- Clients Available for Wait List – This email is sent to business’ Wait List email address when a client cancels or moves an appointment resulting in an opening that matches clients on your list.
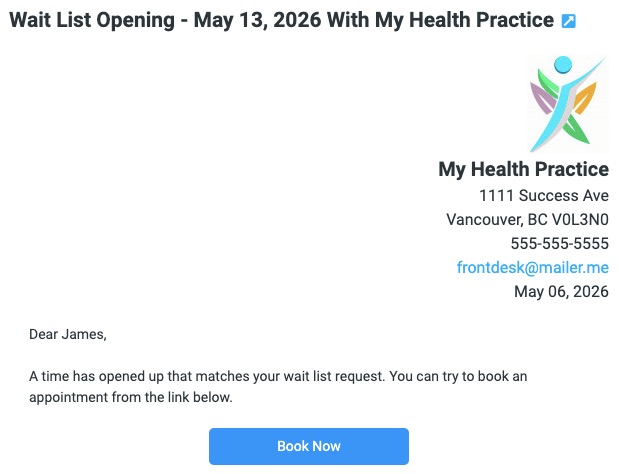
- Wait List Opening – An email to clients informing there is a time that has opened that matched their wait list request. This email will include a link to your client booking calendar that directs the client to the service and week of the opening.